前回まででlaravelのJWTでメール認証を実装しました。
今回は使い方です。
コマンドプロントから実行する方法を掲載していますが、POSTMANやInsominiaクライアントのアプリを使ったほうがわかりやすいと思います。
PostmanのDownloadはこちら
こちらにPOSTMAN用のデータを置いておきます。
JWT Auth.postman_collection.json
InsominaのDownloadはこちら
こちらにInsomnia用のデータを置いておきます。
JWT Auth Test.json
シェルコマンドで実行する場合は以下の記事を参考にしてください
ユーザー登録API
リクエスト
[bash]
% curl http://backend.test/api/auth/register -X POST -d email=test@sample.com -d name="テストユーザー" -d password=password -d password_confirmation=password
[bash]
### レスポンス
[bash]
{
"status":200,
"statusText":"OK",
"data":"",
"request":"register"
}
[/bash]
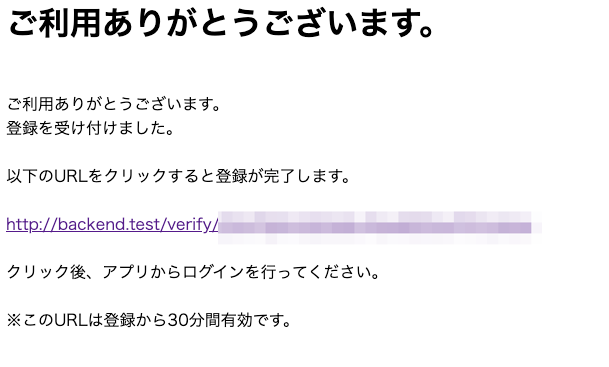
emailが届きます。内容はこちら

Emailの承認URLをクリックしたらこの様な画面が表示されログイン可能になります。

ログインAPI
リクエスト
[bash]
% curl http://backend.test/api/auth/login -X POST -d email=test@sample.com -d password=password
[/bash]
レスポンス
[bash]
{
"status":200,
"statusText":"OK",
"data":{
"access_token":"トークン",
"token_type":"bearer",
"expires_in":3600
},
"request":"login"
}
[/bash]
今後はaccess_tokenを使ってリクエストします
ユーザー情報の取得
リクエスト
[bash]
% curl http://backend.test/api/auth/me -H "Authorization: Bearer [access_tokenを記述]"
[/bash]
レスポンス
[bash]
{
"status":200,
"statusText":"OK",
"data"{
"id":18,
"name":"\u30c6\u30b9\u30c8\u30e6\u30fc\u30b6\u30fc",
"email":"test@sample.com",
"email_verified_at":"2020-05-13 22:55:33",
"created_at":"2020-05-13 22:50:30",
"updated_at":"2020-05-13 22:55:33",
"name_kana":null,
"birthday":null,
"gender":null,
"zip_cd":null,
"pref_id":null,
"address1":null,
"address2":null,
"address3":null,
"phone_number":null,
"memo":null
},
"request":"me"
}
[/bash]
ユーザー情報更新API
リクエスト
レスポンスのdataで使われている値を変更できます。
[bash]
% curl http://backend.test/api/auth/update -X POST -H "Authorization: Bearer [access_tokenを記述]" -d birthday="2020-01-01" -d gender="male" -d ……
[/bash]
レスポンス
[bash]
{
"status":200,
"statusText":"OK",
"data":{
"id":18,
"name":"\u30c6\u30b9\u30c8\u30e6\u30fc\u30b6\u30fc",
"email":"test@sample.com",
"email_verified_at":"2020-05-13 22:55:33",
"created_at":"2020-05-13 22:50:30",
"updated_at":"2020-05-13 23:10:43",
"name_kana":null,
"birthday":"2020-01-01",
"gender":"male",
"zip_cd":null,
"pref_id":null,
"address1":null,
"address2":null,
"address3":null,
"phone_number":null,
"memo":null
},
"request":"update"
}
[/bash]
パスワードリマインダーAPI
パスワードを忘れたときなどに利用するAPIです。
登録されたメールアドレス宛にパスワード変更用のURLがメールで送られます。
リクエスト
[bash]
% curl http://backend.test/api/auth/reminder -X POST -d email="test@sample.com"
[/bash]
レスポンス
[bash]
{
"status":200,
"statusText":"OK",
"data":"",
"request":"reminder"
}
[/bash]
ステータスに200が返却されたらリクエストは成功です
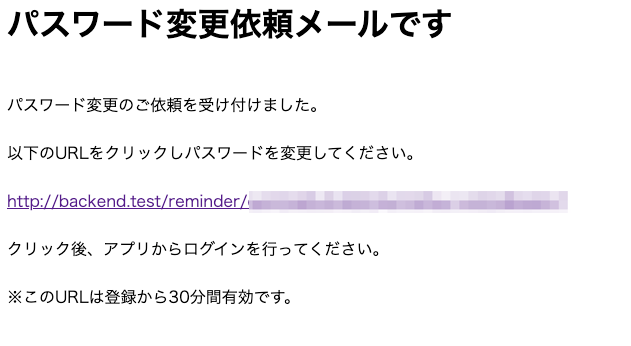
emailリマインダー用のURLがメールに届いているので確認します。

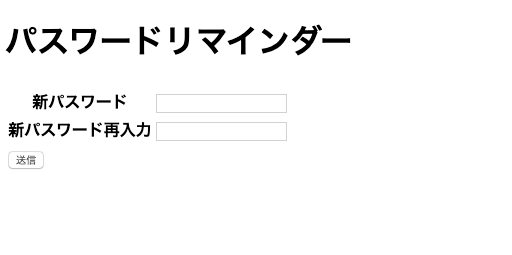
指定されたURLを開くとパスワードの変更画面が表示されます。

変更を行い送信ボタンを押して完了です。
ログアウトAPI
リクエスト
[bash]
% curl http://backend.test/api/auth/logout -H "Authorization: Bearer [access_tokenを記述]"
[/bash]
レスポンス
[bash]
{
"status":200,
"statusText":"OK",
"data":"",
"request":"logout"
}
[/bash]
これでトークンは破棄されます。再度ログインするにはログインAPIを実行し新たにトークンを取得し直す必要があります。
トークンリフレッシュAPI
アクセストークンの期限は短いので新たに取得し直す場合、リフレッシュを実行すると新たにトークンを作り直し、取得することができます。
リクエスト
[bash]
% curl http://backend.test/api/auth/refresh −X POST -H "Authorization: Bearer [access_tokenを記述]"
[/bash]
レスポンス
[bash]
{
"status":200,
"statusText":"OK",
"data":{
"access_token":"再発行されたトークン",
"token_type":"bearer",
"expires_in":3600
},
"request":"refresh"
}
[/bash]
これ以降は再発行されたトークンを使ってアクセスします。
以上APIの使い方でした
次回からこのAPIを使ってVue.js+Nuxt.jsでフロントエンドの開発をしていきます


コメント