Python(Django)+Vue.js(Nuxt.js,Vuetify)を使ったシステムの開発です。
今回はショッピングページを作ります。
このページではVueのコーディングが多数入ります。
ショッピングページ
% vi pages/shopping.vueとりあえずソースはこちら。
コードの詳細は後でまとめます。😅
<template>
  <v-layout column justify-center align-center>
    <v-flex col="12">
      <v-row>
      <v-col>
        <h1><p class="text-center">見積もり</p></h1>
      </v-col>
    </v-row>
    <v-row>
      <v-col cols="12" md="8" lg="8" xl="8" pa-4>
          <div class="pl-4 pr-4 pt-4">
            <v-select
            v-model="selected_cpu_id"
            item-text="name"
            item-value="id"
            :items=cpus
            return-object
            :clearable="true"
            label="CPUを選ぶ">
            </v-select>
          </div>

          <div class="pl-4 pr-4">
            <v-select
            v-model="selected_mother_board_id"
            item-text="name"
            item-value="id"
            :items=mother_boards
            return-object
            :clearable="true"
            label="マザーボードを選ぶ">
            </v-select>
          </div>

          <div class="pl-4 pr-4">
            <v-select
            v-model="selected_video_card_id"
            item-text="name"
            item-value="id"
            :items=video_cards
            return-object
            :clearable="true"
            label="ビデオカードを選ぶ">
            </v-select>
          </div>

          <div class="pl-4 pr-4">
            <v-select
            v-model="selected_storage_id"
            item-text="name"
            item-value="id"
            :items=storages
            return-object
            :clearable="true"
            label="ストレージを選ぶ">
            </v-select>
          </div>

          <div class="pl-4 pr-4 pb-4">
            <v-select
            v-model="selected_pc_case_id"
            item-text="name"
            item-value="id"
            :items=pc_cases
            return-object
            :clearable="true"
            label="ケースを選ぶ">
            </v-select>
          </div>
      </v-col>

      <v-col ols="12" md="4" lg="4" xl="4" pa-4>
        <v-card outlined>
          <v-card-title align="center">見積り明細</v-card-title>
          <v-card-text>
            <v-row v-for="(item, ix) in selected" :key=ix>
              <v-col v-if="item.name != undefined" class="item-name col-8">{{item.name}}</v-col>
              <v-col v-if="item.name != undefined" class="item-price col-4">{{item.price|japrice}}</v-col>
            </v-row>
          </v-card-text>
          <div class="card-text col-12">
            <v-divider></v-divider>
            <div class="row">
              <div class="item-name col-8">合計金額</div>
              <div class="item-price col-4">{{all_price|japrice}}</div>
            </div>
            <div class="row">
              <div class="item-name col-8">消費税({{tax_rate}}%)</div>
              <div class="item-price col-4">{{tax_price|japrice}}</div>
            </div>
          </div>
          <div class="card-text col-12">
            <v-divider></v-divider>
            <div class="row">
              <div class="item-name col-8">お支払金額</div>
              <div class="item-price col-4">{{total_price|japrice}}</div>
            </div>
          </div>

          <div class="card-text col-12" v-if="total_price > 0">
            <v-divider></v-divider>
            <v-col class="text-center" cols="12">
            <div class="my-2">
              <v-btn large color="primary">購入</v-btn>
            </div>
            </v-col>
          </div>
        </v-card>
      </v-col>
    </v-row>
    </v-flex>
  </v-layout>
</template>

<script>
import axios from "axios"

export default {
  name: 'Shopping',
  // フィルター
  filters: {
     japrice: function(str){
       if(isNaN(str)){
          return ""
       }else{
          let num = parseInt(str, 10)
          return '¥'+num.toLocaleString()
       }
     }
  },
  data: function() {
    return {
      tax_rate: 10,
      // 取得DATA
      cpus: [],
      mother_boards: [],
      video_cards: [],
      storages: [],
      pc_cases: [],
      // 選択ID
      ids: {
        cpu: Number,
        mother_board: Number,
        video_card: Number,
        storage: Number,
        pc_case: Number
      },
      // 選択オブジェクト
      selected: {
        cpu: {},
        mother_board: {},
        video_card: {},
        storage: {},
        pc_case: {},
      }
    }
  },
  created: function() {

    // TODO: ここは1回で読み込めたほうがサーバの負荷が少ないので改良すること。
    // CPU取得
     let api = "http://127.0.0.1:8000/api/item/?category=1"
     axios.get(api).then(
      function(response) {
        this.cpus = response.data
        //console.log(this.cpus)
      }.bind(this)
    )
    let api2 = "http://127.0.0.1:8000/api/item/?category=2"
     axios.get(api2).then(
      function(response) {
        this.mother_boards = response.data
        //console.log(this.mother_boards)
      }.bind(this)
    )
    let api3 = "http://127.0.0.1:8000/api/item/?category=3"
     axios.get(api3).then(
      function(response) {
        this.video_cards = response.data
        //console.log(this.video_cards)
      }.bind(this)
    )
    let api4 = "http://127.0.0.1:8000/api/item/?category=4"
     axios.get(api4).then(
      function(response) {
        this.storages = response.data
        //console.log(this.storages)
      }.bind(this)
    )
    let api5 = "http://127.0.0.1:8000/api/item/?category=5"
     axios.get(api5).then(
      function(response) {
        this.pc_cases = response.data
        //console.log(this.pc_cases)
      }.bind(this)
    )
  },
  computed: {
    //TODO: ここはほぼ同じ処理の繰り返しのため構造を検討すること
    // 算出プロパティ
    selected_cpu_id: {
      get () {
        return this.ids.cpu
      },
      set (param) {
        if(param){
          this.ids.cpu = param.id
          this.selected.cpu = param
        }else{
          this.ids.cpu = ""
          this.selected.cpu = {}
        }
      },
    },
    selected_mother_board_id: {
      get () {
        return this.ids.mother_board
      },
      set (param) {
        if(param){
          this.ids.mother_board = param.id
          this.selected.mother_board = param
        }else{
          this.ids.mother_board = ""
          this.selected.mother_board = {}
        }
      }
    },
    selected_video_card_id: {
      get () {
        return this.ids.video_card
      },
      set (param) {
        if(param){
          this.ids.video_card = param.id
          this.selected.video_card = param
        }else{
          this.ids.video_card = ""
          this.selected.video_card = {}
        }
      }
    },
    selected_storage_id: {
      get () {
        return this.ids.storage
      },
      set (param) {
        if(param){
          this.ids.storage = param.id
          this.selected.storage = param
        }else{
          this.ids.storage = ""
          this.selected.storage = {}
        }
      }
    },
    selected_pc_case_id: {
      get () {
        return this.ids.pc_case
      },
      set (param) {
        if(param){
          this.ids.pc_case = param.id
          this.selected.pc_case = param
        }else{
          this.ids.pc_case = ""
          this.selected.pc_case = {}
        }
      }
    },
    all_price: {
      get () {
        let total = this.calc_total()
        return total
      }
    },
    tax_price: {
      get () {
        let total = this.calc_total()
        // 消費税計算
        total = Math.floor(total * this.tax_rate / 100)
        return total
      }
    },
    total_price: {
      get () {
        let total = this.calc_total()
        // 消費税計算
        let tax = Math.floor(total * this.tax_rate / 100)
        // 税込トータル金額
        return total + tax
      }
    }
  },
  methods: {
    // 合計金額を算出
    calc_total: function(){
        let total = 0
        if (typeof this.selected.cpu.price !== 'undefined') {
          total = total + this.selected.cpu.price
        }
        if (typeof this.selected.mother_board.price !== 'undefined') {
          total = total + this.selected.mother_board.price
        }
        if (typeof this.selected.video_card.price !== 'undefined') {
          total = total + this.selected.video_card.price
        }
        if (typeof this.selected.storage.price !== 'undefined') {
          total = total + this.selected.storage.price
        }
        if (typeof this.selected.pc_case.price !== 'undefined') {
          total = total + this.selected.pc_case.price
        }
        return  total
    }
  }
}
</script>

<style>
.item-name{
    text-align: left;
}
.item-price{
    text-align: right;
}
</style>
実行
% yarn dev左メニューから「見積もりページ」を開きます
この様な画面が表示されれば動作していると思います。
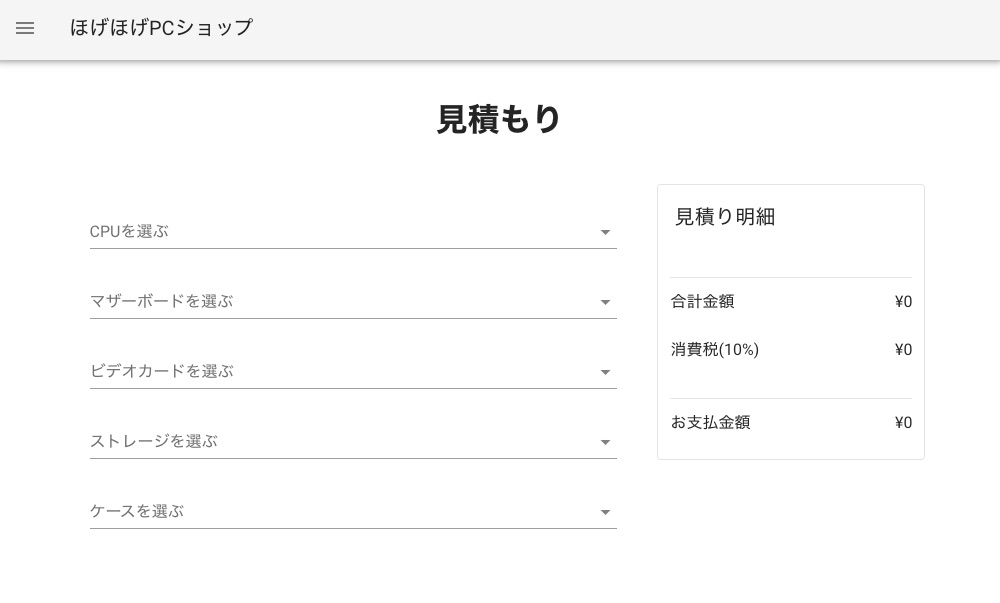
まだサーバ側が動作していないのでパーツを選択しても動作しません。
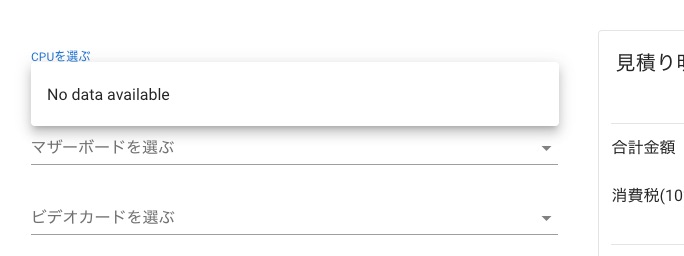
サーバ起動
その前に!完全に忘れていました。
CORS(ross-Origin Resource Sharing)設定が抜けていました。
まずライブラリのインストール
(venvMitsumori) % pip install django-cors-headerspython側のsettings.pyを修正する必要があります。
vi mitsumori/mitsumori/settings.py
...
INSTALLED_APPS = [
    ...
    'corsheaders', ←追加
]
...
MIDDLEWARE = [
    ...
    'corsheaders.middleware.CorsMiddleware',←追加
]
...
CORS_ORIGIN_ALLOW_ALL = True ←行末に追加
...
以上でCORSに対応できます。
それではデータベースを参照するためのAPIサーバを起動します。
サーバ側はPythonで作成しているのでPythonの仮想環境に入り起動します。
ターミナルを開き
% cd venvMitsumori
% source bin/activate
(venvMitsumori) % cd mitsumori
(venvMitsumori) % python manage.py runserver

Watching for file changes with StatReloader
Performing system checks...

System check identified no issues (0 silenced).
February 19, 2020 - 16:27:53
Django version 3.0.2, using settings 'mitsumori.settings'
Starting development server at http://127.0.0.1:8000/
Quit the server with CONTROL-C.
この様に表示されればサーバは起動しています。
早速ブラウザーに戻り一度リロードします。
CPUやマザーボードを選択します
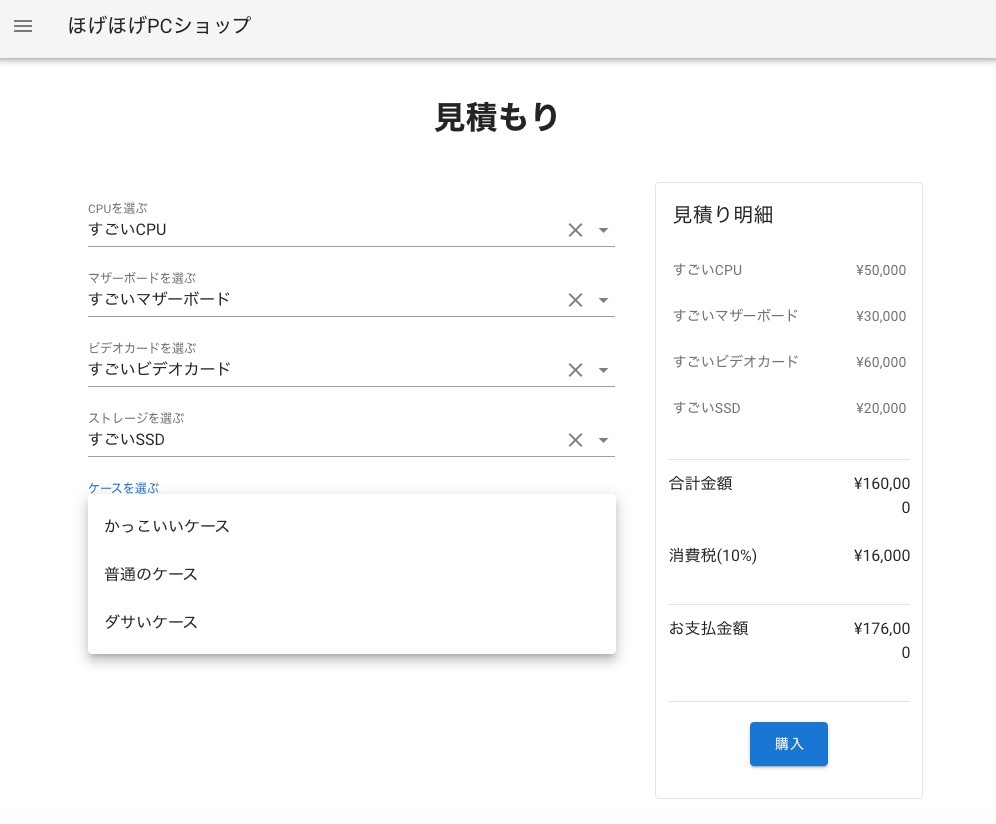
正しく動作すると商品が選択できるようになり、選んだ商品の見積もり明細が表示されるはずです。
商品の追加や削除
管理画面から商品追加と削除が行えます。
http://127.0.0.1:8000/admin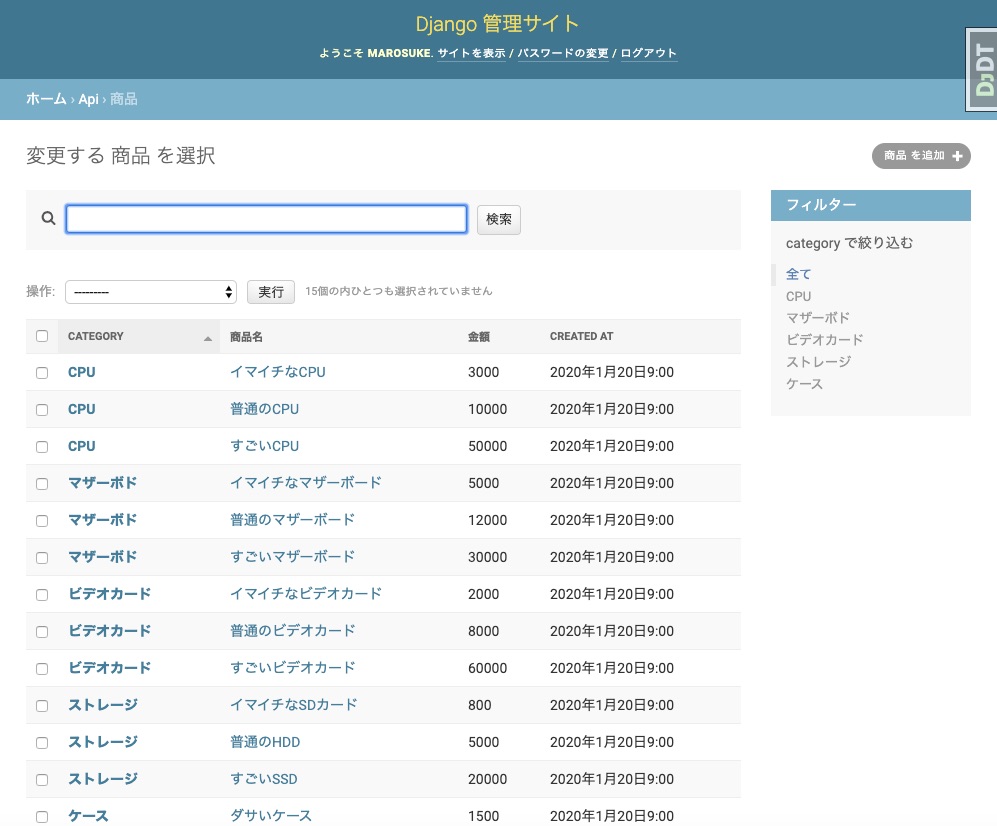
終わり
以上でPython(Django)+Vue.js(Nuxt.js+Vuetify)の開発は終わります。
まだ、Nux.jsの機能を全然使いこなせてないので、近いうちにこのデモサイトを拡張していこうと思います。
また、今回掲載したコードの詳細は別途まとめようと思っています。
まだこのサイトは改善の余地があるので、もう少し改良していこうと思います。
また、Vueを使ったグラフの描画やVuexを使ったページ間のデータ受け渡しなども書いていこうと思っています。




コメント